
 Posts
Posts


For a glimpse of how BrickMagic went on Mother's Day weekend, check out the BrickMagic flickr pool (all of my ~500 photos have been added here).
I'm also one of the 11 builders featured by name in this wrap-up at motherboard.tv.
I don't intend to do a full recap - since this was the first year this event was put on, the negative stuff will be sent to Joe sooner or later as feedback and chalked up as lessons learned. Many of the highlights aren't things we can share much of (set designers showing us prototypes, private info on the idea house, etc). I'm told that some video was taken for the BrickJournal website, but I have no what (if anything) will surface. Time will tell. I need to move on to the next thing now.
Showing posts with label lego. Show all posts
Showing posts with label lego. Show all posts
Wednesday, May 12, 2010

Friday, April 23, 2010
Minifig-scale Desk
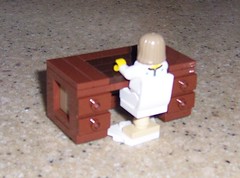 Here's another small project I built fairly recently: a minifig-scale LEGO desk. Most of the parts for this were taken from a copy of the Crystal Skull temple Indiana Jones kit. The photos didn't come out well (I rushed photos of quite a few things so I'd have more links ready for Maker Faire NC), but the desk itself is a design I'm happy with. Note that the dark tan tiles are set back a tile's thickness from the frame of the desk. I'm also happy with the blotter and the drawer pulls. A great use of that small amount of dark brown and dark tan you can't build much with!
Pretty much everything done in this desk has been done elsewhere - the techniques aren't particularly complex, but they work well.
Modifying LEGO Set 8880
LEGO set 8880, the Technic Supercar, is one of the greatest LEGO sets of all time (you can argue otherwise, but you would be wrong). When I finally bought mine on eBay (you can buy used copies in decent shape there for roughly the original retail price), mine had a few parts that were incorrect. Since an incomplete set can't really hold up as a collectible, I went ahead and started modding mine. The obvious things to change were places where other parts are more appropriate, but didn't exist back in 1994. So I focused on a few changes, based on newer parts (and preserving the look and feel of the set as much as possible):
1. Allow the suspension to use more of the large springs' shafts.
2. Secure the steering to prevent half-bushings from falling off (a minor issue normally, exaggerated by change #1).
3. Expand the wheel wells so that the wheels never get stuck (this worked in the original it but change #1 broke it).
4. Add a Power Functions motor (motorizing this kit is generally considered impossible).
The suspension and steering came out well. The motor only works in second gear, and even then I had to keep the trunk open for it and sturdy up an axle (the chain for the engine is the weak link). Change #3 does make the front of the car visibly less smooth, but functionally is fine. Long story short: I need to design my own supercar from scratch one of these days.
More details on flickr, along with a display idea (put the car "up on blocks" and use a mirror underneath to make more of the internals visible).
1. Allow the suspension to use more of the large springs' shafts.
2. Secure the steering to prevent half-bushings from falling off (a minor issue normally, exaggerated by change #1).
3. Expand the wheel wells so that the wheels never get stuck (this worked in the original it but change #1 broke it).
4. Add a Power Functions motor (motorizing this kit is generally considered impossible).
The suspension and steering came out well. The motor only works in second gear, and even then I had to keep the trunk open for it and sturdy up an axle (the chain for the engine is the weak link). Change #3 does make the front of the car visibly less smooth, but functionally is fine. Long story short: I need to design my own supercar from scratch one of these days.
More details on flickr, along with a display idea (put the car "up on blocks" and use a mirror underneath to make more of the internals visible).
Thursday, April 22, 2010
9V Thomas the Tank Engine
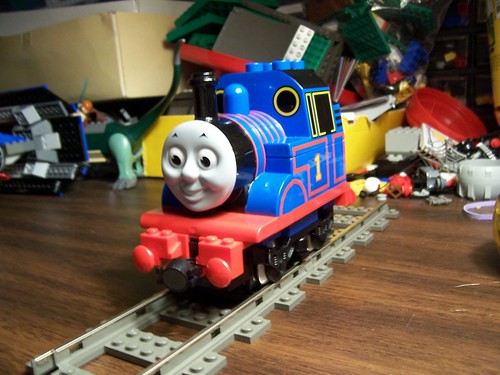
My 9V Thomas the Tank Engine model has gone unblogged for no apparent reason. The photos sort of speak for themselves in this case, but here's a blog post for it. The photos are on flickr (with an outdated tongue-in-cheek description), and yes, this model will be at Maker Faire NC this weekend.
Monday, April 5, 2010
Pneumatic Walker From Only LEGO Set 8049
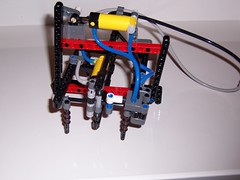 When I realized I'd have only one week between LEGOPalooza and Robot Rumble in which to build a new robot, I decided I needed to pick a small project to do. Having already sized up the 2010 LEGO TECHNIC Log Loader (8049) kit to determine that it included the necessary pneumatic elements to build a simple pneumatic walker, I decided to try building a walker with that set. So with one week on the clock, the challenge was set: build a functional walker, controlled by a pneumatic circuit, without cutting tubes, and without using any parts that aren't found in that set's box (and at the same time, leaving most of the set's parts still available).
 The version brought to Robot Rumble was a bit rough, strained a few parts, and squeaked when certain parts rubbed together (this came in at 100 pieces). A revision was needed (this came in at 109 pieces). I made instructions for both versions (1, 2). I only recommend the second version, which features my later performance improvements. You might be able to make another walker that runs even more smoothly using the parts from this kit, but as far as I am concerned this challenge has been met.
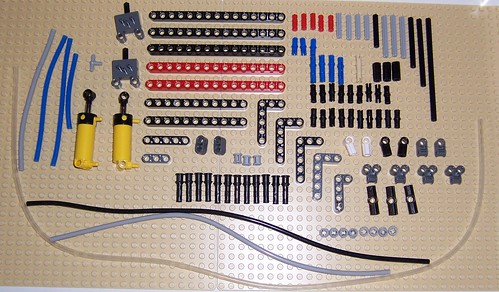
The easiest way to browse the photos that make up the instructions is via flickr. You can come back and read the description of what's going on in this model after you've tried building it (it's alright, it'll still be here).
Pneumatic logic works in much the same way that electronic logic works, but instead of electricity controlling the flow of electricity, pressurized air is controlling the flow of pressurized air. You can actually use LEGO pneumatics parts to build a variety of logic gates. There's nothing stopping you (in theory) from building an entire computer out of nothing but pneumatic logic gates. Personally, I like the pneumatic circuit I used in this model as an extremely primitive example of a two-bit pneumatic counter with no carry-over digit (yes, I'm just that nerdy). When you're limited to this few valves and pistons, though, it's hard to do much in the way of complex circuitry - so you don't really need to understand logic gates to follow what's happening here. Eric Brok documented this sort of pneumatic control system some years ago, and did it in a clear, less nerdy way, complete with color-coded schematics. In my model, the white parts show you where a piston is connected to a valve, and the pistons control each other's valves like in Eric's first illustration.
Pneumatic walkers were once considered something of a fad and a classic project among LEGO Technic fans. Pneuma-Ped is a good example of a somewhat more complex model, but some of the ones on LUGNET's list are much more ambitious (also, expensive and parts-intensive - the difficulty of getting pneumatic elements at a good price is part of why I set this challenge to myself to use only parts from one kit that's currently widely available).
I highly recommend buying this set from one of these two links (I receive a small commission for each kit bought through these links):
Buy LEGO TECHNIC Log Loader (8049) via LEGO Shop-at-Home
Buy LEGO TECHNIC Log Loader (8049) via Amazon

If you want to try something similar without this kit, or buy additional parts to build a more complex machine like this one, you can order parts online. Some LEGO pneumatic elements are currently available (in some cases, exclusively available) through LEGO Education. All manner of LEGO elements can be bought individually through various sellers on BrickLink.
Instructions style and the "take photos as you take it apart" technique blatantly ripped off of http://nxtprograms.com/
My design is fairly similar to one I've blogged previously for LMOTD. Since that builder was working towards a different challenge (building the smallest possible walker), the end result is actually quite different. The similarities come from using it as inspiration - I'm having a hard time recalling if I was inspired by any other two valve / two piston walkers, but I liked the hexapod mechanism here and can't seem to locate other simple walker links offhand (if you have links I should share or cite here, feel free to drop me a line at 316danny@gmail.com)
EDIT 4/28/2010: There's now a video of this in action (thanks to Jesse Bikman, who took this video at Maker Faire NC and has added it to that show's flickr pool).
Thursday, April 1, 2010
Recent Photos
I've recently uploaded several bunches of photos on flickr. I decided to give up and go pro. That gives me two years before I need to come up with a better photo solution (although notes and the social aspects of flickr do appeal to me, the thought of needing to pay Flickr/Yahoo! ~$2 a month until the end of time does not).
I'm particularly interested in feedback on the instructions for the pneumatic walker. A finalized version of those will appear soon, and I'd like to see that version be more user friendly in addition to the model itself being more functional.
Here are the new photo sets:
I'm particularly interested in feedback on the instructions for the pneumatic walker. A finalized version of those will appear soon, and I'd like to see that version be more user friendly in addition to the model itself being more functional.
Here are the new photo sets:
- Robot Rumble 2010
- Primitive Walker Concept
- Walker I instructions (this is the one I want feedback on)
- LEGO Technique Studies (I'll probably add to this one occasionally without posting about it here)
- Joe Meno's February/March 2010 WITC
- BrickFair 2009 (previously posted to Brickapolis' flickr account - but I wanted them on mine now that I've gone pro as well)
- LEGOPalooza 2010
- Over the Rhine March 13th 2010 (proof I need concert photo tips)
Wednesday, March 24, 2010
NXT Holonomic Drive Idea
Holonomic drive systems are difficult to build with LEGO. I've never successfully built one myself, but I started to try once and I see it as something that will be increasingly easy to do in the future. You can already see more three-sided elements showing up in current sets that will make this an easier thing to do. I'm hoping that someone with more time to work on this will take it up and be able to use my attempt as a starting point. If you do, let me know and I'll let my readers know.
From my one given-up-on attempt, here's my contribution to this:
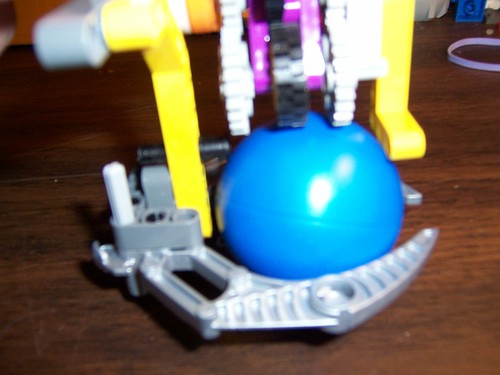
The idea: use 3 of these modules (of which I only ever built this one - I doubt that this exact design would actually be able to hold the weight of a frame and a battery box to power it), and only power the ones you need to go a particular direction. The ball will function as an unpowered caster until a motor is turned on in either direction. When the motor turns on, the geared bar swings down and the wheel in the middle will power the ball. This is an extreme take on the poor man's directional transmission concept, and I suspect that it won't work so well once there's more weight on it - but it's an idea. Omni wheels would probably be harder to build but function more smoothly. Personally, I really like the idea of a wheel that can be powered selectively, but I think it would need to be much sturdier and more firmly powered than this.
More photos are on flickr (I finally went pro and started cleaning up my account, which is how I remembered I never did blog these photos) at http://www.flickr.com/photos/dp3/sets/72157623684905594/
From my one given-up-on attempt, here's my contribution to this:
The idea: use 3 of these modules (of which I only ever built this one - I doubt that this exact design would actually be able to hold the weight of a frame and a battery box to power it), and only power the ones you need to go a particular direction. The ball will function as an unpowered caster until a motor is turned on in either direction. When the motor turns on, the geared bar swings down and the wheel in the middle will power the ball. This is an extreme take on the poor man's directional transmission concept, and I suspect that it won't work so well once there's more weight on it - but it's an idea. Omni wheels would probably be harder to build but function more smoothly. Personally, I really like the idea of a wheel that can be powered selectively, but I think it would need to be much sturdier and more firmly powered than this.
More photos are on flickr (I finally went pro and started cleaning up my account, which is how I remembered I never did blog these photos) at http://www.flickr.com/photos/dp3/sets/72157623684905594/
Monday, March 22, 2010
Robot Rumble 2010 Recap
A brief recap from yesterday's show:
Robot Rumble 2010 was a great show. As a LEGO-only person (this time out, anyway) with Triangle Amateur Robotics, I ended up being a bit of a point person for various AFOL-related topics. Although there was a group from IBM calling itself "Lego and Dancing Robotics" (long story short: they build generic 'bots from the NXT Education edition booklet and make them "dance" around. It's an outgrowth of an older educational program that they started a few years back), and there were several FIRST LEGO League teams on hand, I ended up fielding questions about LEGO, NCLUG, LEGOPalooza, and BrickMagic, alongside the more expected TAR, Maker Faire NC, TechShop, pneumatics, programming, and robotics questions. Some of it was influenced by the fact that we were so close to the front of the museum, but overall I feel like it was a good idea to have a dedicated LEGO robotics adult there (no offense - but there's a decided shortage of active LEGO hobbyists in this area who are into the robotics side of things).
The other groups displaying (listed at the official event link above) were alright, although a few were a little anticlimactic - Carolina Combat Robotics spent the day playing robot hockey instead of battle bots (maybe I got the wrong impression from their name...) and iRobot brought out almost the exact same display that they had at the NCSU career fair last year. The IBM group was helpful, since I could refer requests to see my NXT kit in action to their group. One of the IBMers also clued me in to OpenCV, which looks like something I can use with all those Logitech cameras I've been stashing around the house (back when LEGO had a branded version of the Logitech QuickCam and Logitech was still supporting the programming API for the QuickCam, I got excited about the idea of building a serious robot with them and started buying up every one I could find cheap).
My pneumatic walker spent most of the day between a completely homebrew line-follower and a Zhu-zhu pet, which is actually a pretty good metaphor for the range of robots you'll see at TAR. It was fun blowing people's minds with an entirely pneumatic robot - although pneumatic logic is old-hat by the standards of the LEGO fan community (in the late '90's/early '00's, it was something of a classic project and a fad), most people still have never seen a pneumatic walker or heard of a pneumatic logic control circuit. The idea of a system that doesn't need any software is apparently pretty far out of the mainstream of robotics now. Parents and kids, on the other hand, were pretty thrilled with this - here's something you can build and design yourself, with a little thought and less than $60 down into the hobby. A simple $60 walking robot (with almost 500 spare parts afterward) is understandably more appealing than spending ~$250 for an NXT kit and then not knowing quite how to use it and program it (which, of course, is why I intend to post instructions and encourage today's kids and parents to take this project up). Another fun thing I noticed was that kids really loved the pneumatic hand pump. Sure, it was annoying spending ~4 hours of my Saturday pumping up air pressure for my walker, but it was kind of fun to hand it over when kids asked "Can I try?", and then watch as every kid near the booth had a chance to "control" it for a minute or two. During the few times when the walker was unattended, kids were able to figure out how to use the pump and run the 'bot on their own. Next few LEGO shows, I'll have to make a point to have an interactive element controlled by a pump.
I will, as promised, deliver instructions for my pneumatic walker shortly. I've been making some revisions to allow it to run more smoothly, and I'm not entirely sure at the moment when/where I'll be putting photos and instructions online. I may test further - I had taken all the photos I needed to post instructions in the style of nxtprograms.com before, but then I realized I needed to work on reliability so that this would be ready for hours of use. I'll probably put off doing another round of instruction photos until I've worked out those kinks.
Expect event photos to show up online around the same time.
Robot Rumble 2010 was a great show. As a LEGO-only person (this time out, anyway) with Triangle Amateur Robotics, I ended up being a bit of a point person for various AFOL-related topics. Although there was a group from IBM calling itself "Lego and Dancing Robotics" (long story short: they build generic 'bots from the NXT Education edition booklet and make them "dance" around. It's an outgrowth of an older educational program that they started a few years back), and there were several FIRST LEGO League teams on hand, I ended up fielding questions about LEGO, NCLUG, LEGOPalooza, and BrickMagic, alongside the more expected TAR, Maker Faire NC, TechShop, pneumatics, programming, and robotics questions. Some of it was influenced by the fact that we were so close to the front of the museum, but overall I feel like it was a good idea to have a dedicated LEGO robotics adult there (no offense - but there's a decided shortage of active LEGO hobbyists in this area who are into the robotics side of things).
The other groups displaying (listed at the official event link above) were alright, although a few were a little anticlimactic - Carolina Combat Robotics spent the day playing robot hockey instead of battle bots (maybe I got the wrong impression from their name...) and iRobot brought out almost the exact same display that they had at the NCSU career fair last year. The IBM group was helpful, since I could refer requests to see my NXT kit in action to their group. One of the IBMers also clued me in to OpenCV, which looks like something I can use with all those Logitech cameras I've been stashing around the house (back when LEGO had a branded version of the Logitech QuickCam and Logitech was still supporting the programming API for the QuickCam, I got excited about the idea of building a serious robot with them and started buying up every one I could find cheap).
My pneumatic walker spent most of the day between a completely homebrew line-follower and a Zhu-zhu pet, which is actually a pretty good metaphor for the range of robots you'll see at TAR. It was fun blowing people's minds with an entirely pneumatic robot - although pneumatic logic is old-hat by the standards of the LEGO fan community (in the late '90's/early '00's, it was something of a classic project and a fad), most people still have never seen a pneumatic walker or heard of a pneumatic logic control circuit. The idea of a system that doesn't need any software is apparently pretty far out of the mainstream of robotics now. Parents and kids, on the other hand, were pretty thrilled with this - here's something you can build and design yourself, with a little thought and less than $60 down into the hobby. A simple $60 walking robot (with almost 500 spare parts afterward) is understandably more appealing than spending ~$250 for an NXT kit and then not knowing quite how to use it and program it (which, of course, is why I intend to post instructions and encourage today's kids and parents to take this project up). Another fun thing I noticed was that kids really loved the pneumatic hand pump. Sure, it was annoying spending ~4 hours of my Saturday pumping up air pressure for my walker, but it was kind of fun to hand it over when kids asked "Can I try?", and then watch as every kid near the booth had a chance to "control" it for a minute or two. During the few times when the walker was unattended, kids were able to figure out how to use the pump and run the 'bot on their own. Next few LEGO shows, I'll have to make a point to have an interactive element controlled by a pump.
I will, as promised, deliver instructions for my pneumatic walker shortly. I've been making some revisions to allow it to run more smoothly, and I'm not entirely sure at the moment when/where I'll be putting photos and instructions online. I may test further - I had taken all the photos I needed to post instructions in the style of nxtprograms.com before, but then I realized I needed to work on reliability so that this would be ready for hours of use. I'll probably put off doing another round of instruction photos until I've worked out those kinks.
Expect event photos to show up online around the same time.
Thursday, March 18, 2010
Behind the Scenes Work
Not too much is happening here - last week's show was a bit of a bust for me but went surprisingly well overall in spite of some drama within NCLUG (in spite of months of work, the project I wanted to display at this event was not yet presentable). While I'm not used to having a supporting role at a LEGO show, things seem to have gone off well. The extra time came in handy - I ended up having some "work work" to do over the weekend, and I managed to squeeze in a concert on Saturday night. I've barely started attempting to clean up or post photos yet. I am now prepping for Robot Rumble this upcoming weekend. The next few weeks will involve more tidying up (my build area is currently absolutely unsafe) and preparing various things I'm planning on bringing to Maker Faire.
It looks like I'll be on my own for Maker Faire this year. Speaking of NCLUG drama...everyone wants to do more shows, but when we have one that's ours for the taking, nobody else wants to participate. There are some issues involved with coordinating a large group for a one day show, but I'd definitely say it's worth it to engage the larger hobbyist/DIY community and not just the families that tend to go to LEGO-only shows. Their loss - I'll be there and we'll have a great time. My only concern is that I might not have enough time to see the various other exhibits at the Faire.
Speaking of not having time, I'm stalling my wheels on pretty much all of my projects lately. In the interest of making it look like there is some progress on the fix-the-blog front, I've played around with the new Blogger Template Designer for a few minutes today (personally, I'm not happy with this tool but it's a slight improvement on their previous WYSIWYG GUI). I'm still not happy with the layout here, but I think it's a step in the right direction. I'm still interested in wasting much less space on the sides of the screen - and I'll probably switch to a 3-column set-up with a proper profile and contact info at some point - but this will have to do until I have more time available.
With any luck, my little pneumatic walker built entirely from the current LEGO Pneumatic Log Loader set will be working well enough for me to work out instructions soon - the current goal is to have that project finished and on display by Saturday. It seems like I can get simple walking mechanisms working, and I can get the binary adder control circuit working (don't worry, I'll explain this when I post instructions), but I can't seem to get everything working well together. As of this writing, the legs slip to the side more than they actually walk forward.
It looks like I'll be on my own for Maker Faire this year. Speaking of NCLUG drama...everyone wants to do more shows, but when we have one that's ours for the taking, nobody else wants to participate. There are some issues involved with coordinating a large group for a one day show, but I'd definitely say it's worth it to engage the larger hobbyist/DIY community and not just the families that tend to go to LEGO-only shows. Their loss - I'll be there and we'll have a great time. My only concern is that I might not have enough time to see the various other exhibits at the Faire.
Speaking of not having time, I'm stalling my wheels on pretty much all of my projects lately. In the interest of making it look like there is some progress on the fix-the-blog front, I've played around with the new Blogger Template Designer for a few minutes today (personally, I'm not happy with this tool but it's a slight improvement on their previous WYSIWYG GUI). I'm still not happy with the layout here, but I think it's a step in the right direction. I'm still interested in wasting much less space on the sides of the screen - and I'll probably switch to a 3-column set-up with a proper profile and contact info at some point - but this will have to do until I have more time available.
With any luck, my little pneumatic walker built entirely from the current LEGO Pneumatic Log Loader
set will be working well enough for me to work out instructions soon - the current goal is to have that project finished and on display by Saturday. It seems like I can get simple walking mechanisms working, and I can get the binary adder control circuit working (don't worry, I'll explain this when I post instructions), but I can't seem to get everything working well together. As of this writing, the legs slip to the side more than they actually walk forward.
Wednesday, February 24, 2010
More Upcoming Events
While I'm still hesitant to share most of the details, I should let my readers know that I'm planning on being at a few other events that are coming up. Here's the full list of possible "tour dates" coming up in 2010 (list was updated March first to reflect events that have been confirmed):
March 13th-14th, Chapel Hill, NC: LEGOPalooza 2010 (look for my GBC factorysets and other buildings in the town display)
March 20th, Durham, NC: Robot Rumble (I'll be the guy with the LEGO)
April 25th, Durham, NC: Maker Faire NC (previously blogged as well - my exhibit has been approved. I'm told that similar exhibits will be lumped together - look for me near the LEGO)
May 6th-9th, Raleigh, NC: BrickMagic
August 5th-8th, Chantilly, VA (just outside Washington DC): BrickFair
The LEGO conventions included in the above list have public hours that do not run for the full length of the event. Make sure that the dates you plan to attend are really available - full info is at the links above. What I bring to show will vary fairly widely between events. I will post more information about these as we get closer to the events - I'm hoping to get to the point where I can point people to this blog when they ask for more details about how things were done.
There was also some chatter about a possible LEGO-related children's class to be offered at a local library here in NC, but at the moment that idea is on the back burner.
March 13th-14th, Chapel Hill, NC: LEGOPalooza 2010 (look for my
March 20th, Durham, NC: Robot Rumble (I'll be the guy with the LEGO)
April 25th, Durham, NC: Maker Faire NC (previously blogged as well - my exhibit has been approved. I'm told that similar exhibits will be lumped together - look for me near the LEGO)
May 6th-9th, Raleigh, NC: BrickMagic
August 5th-8th, Chantilly, VA (just outside Washington DC): BrickFair
The LEGO conventions included in the above list have public hours that do not run for the full length of the event. Make sure that the dates you plan to attend are really available - full info is at the links above. What I bring to show will vary fairly widely between events. I will post more information about these as we get closer to the events - I'm hoping to get to the point where I can point people to this blog when they ask for more details about how things were done.
There was also some chatter about a possible LEGO-related children's class to be offered at a local library here in NC, but at the moment that idea is on the back burner.
Thursday, February 18, 2010
Upcoming Event: Maker Faire NC
EDIT 4/23: While the motorized compressor and some of the car bits I was planning on bringing aren't currently ready to go, we do have enough other exciting things to fill the space packed already. I'm compiling a list of the projects that are packed for Maker Faire NC at the Maker Faire NC post on the NCLUG blog. Please refer to that list if you are looking for more information about anything included at the LEGO DIY display.
The date and location for Maker Faire NC have finally been announced. Generally speaking, I'm not posting too much in advance about events (I'm trying to keep some things as surprises, and I don't want to hype something up if I'm not sure I can finish it in time). However, the application page asks for information about projects we will be bringing, and I thought airing a list publicly would be a good way of summing things up. I have a few creations I've shown off before that I thought would appeal to the more DIY crowd of a Maker Faire. Regrettably, I haven't documented most of them on here yet, but I intend to share more about each of these online eventually and those additional details will appear on this blog.
I intend to bring the following projects (all LEGO-based) to this event:
Lamp - my lamp made primarily out of LEGO, with a socket cord inside. In the spirit of the event, I'll have an extra socket cord out so people can more easily see how to do it themselves.
Magnets - I have a set of LEGO magnets I have built using old DUPLO letter tiles on LEGO magnets. They're a big hit at the office.
Coasters - Yes, you can build coasters out of LEGO.
CD Holder - I have built a few CD holders out of LEGO. I will be showing off the one that is 10" wide.
Robot Band - I have been working on building a LEGO Mindstorms based robotic band. Although I am planning on having enough material programmed to do a show by the end of the year, at this event I intend to demonstrate some of the smaller mechanisms I use for making robots play instruments.
Model car parts - I will bring my modified 8880 kit and some additional model car bits (including manual and automatic transmissions and a gas/electric engine model).
Pneumatics - My electric pneumatic compressor is ready to go. I will bring something (either logic gates / walkers or an arm) to show off with it.
I might try to squeeze in some other goodies. I'm mainly interested in showing off some of the more DIY side of the LEGO hobby. I'm also hoping to arrange an NCLUG group layout of more traditional LEGO creations (assuming there are enough people in that group who can make it and that we can agree on a theme - as of this writing no one else from that group has expressed interest in Maker Faire NC, but I'm trying to change that).
The date and location for Maker Faire NC have finally been announced. Generally speaking, I'm not posting too much in advance about events (I'm trying to keep some things as surprises, and I don't want to hype something up if I'm not sure I can finish it in time). However, the application page asks for information about projects we will be bringing, and I thought airing a list publicly would be a good way of summing things up. I have a few creations I've shown off before that I thought would appeal to the more DIY crowd of a Maker Faire. Regrettably, I haven't documented most of them on here yet, but I intend to share more about each of these online eventually and those additional details will appear on this blog.
I intend to bring the following projects (all LEGO-based) to this event:
Lamp - my lamp made primarily out of LEGO, with a socket cord inside. In the spirit of the event, I'll have an extra socket cord out so people can more easily see how to do it themselves.
Magnets - I have a set of LEGO magnets I have built using old DUPLO letter tiles on LEGO magnets. They're a big hit at the office.
Coasters - Yes, you can build coasters out of LEGO.
CD Holder - I have built a few CD holders out of LEGO. I will be showing off the one that is 10" wide.
Robot Band - I have been working on building a LEGO Mindstorms based robotic band. Although I am planning on having enough material programmed to do a show by the end of the year, at this event I intend to demonstrate some of the smaller mechanisms I use for making robots play instruments.
Model car parts - I will bring my modified 8880 kit and some additional model car bits (including manual and automatic transmissions and a gas/electric engine model).
Pneumatics - My electric pneumatic compressor is ready to go. I will bring something (either logic gates / walkers or an arm) to show off with it.
I might try to squeeze in some other goodies. I'm mainly interested in showing off some of the more DIY side of the LEGO hobby. I'm also hoping to arrange an NCLUG group layout of more traditional LEGO creations (assuming there are enough people in that group who can make it and that we can agree on a theme - as of this writing no one else from that group has expressed interest in Maker Faire NC, but I'm trying to change that).
Wednesday, February 17, 2010
Interesting Links
I'm trying to get out of the habit of keeping links open for long periods of time and not really reading them. So I'm posting these here for my own later reference and for the benefit of anyone else who is intrigued by them as I am.
Isogawa Studio Model Gallery - original LEGO creations by the author of Tora no Maki. Tora no Maki is the fantastic book on mechanisms that everyone who thinks they don't know enough techniques to build with LEGO Technic and Mindstorms parts has been looking for. It's largely pictorial, so the language barrier is a non-issue.
Crowkillers is the website of the famed LEGO builder who designs original super cars that are at, near, or in some cases even beyond the level of quality of set 8880. I had previously only known about his Brickshelf page and sparsely-updated MOCpages account. Now that I've put in the time to provide more background for you, I've also discovered that he's on YouTube. Those of you who aren't supercar geeks can see an overview of his work at TechnicBricks. I fully intend to soak a few more months into the field of building fantastic functional cars at a scale of roughly 1:20. I'm modding my 8880 ever so slowly, trying to improve the suspension and add extra features...
I've been meaning to take some photos and post about the magnet set I made for my office recently. It's been surprisingly popular, and we wish we had a magnetic whiteboard to put them on. I found this how-to on making magnetic whiteboards to be a bit much to try at the office, but it's definitely an exciting idea. If I ever have kids, I'll definitely have to try to get that going in their play room. For now, I'm just sticking my magnets to the frame of the cubicle wall.
This last one I'm a bit less sure about, and frankly the "Featured sites" category looks a bit questionable to me. Supposedly Video Download Helper can work some magic with Flash-based streaming media to make files downloadable. I have no idea if this checks out, but if you try it let me know how it works for you.
Isogawa Studio Model Gallery - original LEGO creations by the author of Tora no Maki. Tora no Maki is the fantastic book on mechanisms that everyone who thinks they don't know enough techniques to build with LEGO Technic and Mindstorms parts has been looking for. It's largely pictorial, so the language barrier is a non-issue.
Crowkillers is the website of the famed LEGO builder who designs original super cars that are at, near, or in some cases even beyond the level of quality of set 8880. I had previously only known about his Brickshelf page and sparsely-updated MOCpages account. Now that I've put in the time to provide more background for you, I've also discovered that he's on YouTube. Those of you who aren't supercar geeks can see an overview of his work at TechnicBricks. I fully intend to soak a few more months into the field of building fantastic functional cars at a scale of roughly 1:20. I'm modding my 8880 ever so slowly, trying to improve the suspension and add extra features...
I've been meaning to take some photos and post about the magnet set I made for my office recently. It's been surprisingly popular, and we wish we had a magnetic whiteboard to put them on. I found this how-to on making magnetic whiteboards to be a bit much to try at the office, but it's definitely an exciting idea. If I ever have kids, I'll definitely have to try to get that going in their play room. For now, I'm just sticking my magnets to the frame of the cubicle wall.
This last one I'm a bit less sure about, and frankly the "Featured sites" category looks a bit questionable to me. Supposedly Video Download Helper can work some magic with Flash-based streaming media to make files downloadable. I have no idea if this checks out, but if you try it let me know how it works for you.
Saturday, February 6, 2010
XKCD Comic (Stand Back - I Know Regular Expressions!)
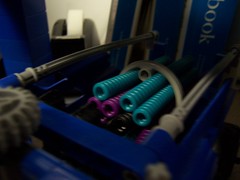
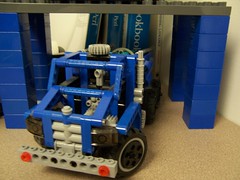
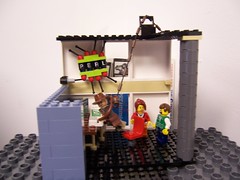 I'm not sure why I didn't blog this earlier - it' s a bit overdue. Several months back, my boss started encouraging me to change up my office LEGO display a bit. I had brought in a set (a dump truck) and filled the back of it with a series of tubes (an obvious Ted Stevens joke that works that much better at a network company). Around Thanksgiving, I built a LEGO version of a favorite XKCD comic strip that mentioned some programming skills I'd learned on the job and enjoy using at work. The photos have been up on flickr for a bit, but I changed out my display again around Christmas break (yep, I'm still using college lingo for vacation days) and I've since brought in even more LEGO (a set of magnets that spell out a slogan). My coworkers are fairly split between people who like LEGO and people who aren't familiar with it, but nobody else is as crazy as I am. I mean, seriously, how devoted do you have to be to have this sort of working collection of sand blue bricks, Technic sets, and DUPLO parts on hand?
So anyway, here are the photos that I apparently uploaded in December but have neglected to post until now. For those of you unfamiliar with XKCD, the comic I used is Regular Expressions.
First, some link action (flickr tags are fun!) - you might find it easier to just browse these photos on flickr :
All photos from that office display
Just the XKCD photos
Or you can click on these photos below for more info (I wrote a description for each photo when I uploaded them):
It's a series of tubes!
The truck, inside the DUPLO "table" I built to let me show the truck and the comic at the same time (the Perl books in the background here and in the other photos just happens to enhance the theme - they're really in the office all the time):
Stand Back - I Know Regular Expressions!
The sufficiently panicked minifigures:
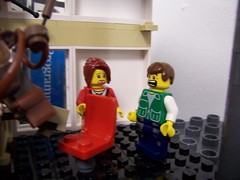
Here's how the whip and Indiana Jones' position works:

Here's a close-up of some LEGO trickery - levers positioned just right to make a sign stay in place. Oh, and I used Technic pins with studs on the end to flip the studs upside-down under the letter bricks.
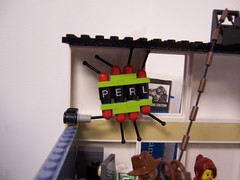
Look! Coincidences!
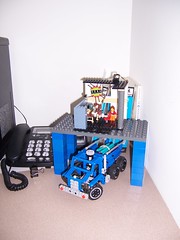
Here's an overview shot of the entire thing (Truck, table, comic, and some office miscellanea):
This final shot of the comic seems like a good one to zoom in on to look at the details (OK, so it's a fairly simple scene, but you can have another look):
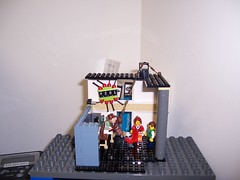
Sadly, my perl/regex related day-saving does not involve a whip...yet.
For more on this topic, check out my LMOTD round-up of XKCD comic strips built in LEGO to minifig scale.
Thursday, January 7, 2010
Well, I Guess We're Here Now
Following up yesterday's note about SparkFun's free day - the meeting was a non-issue. The SparkFun site was down for pretty much the entire time, and we had some 'net connectivity issues on our end as well (ensuring that even when the website was up, I still had a hard time getting any page to load). I guess I won't be making the jump to Arduino just yet (don't worry - I still love my NXT's and I'll keep using them - I just wanted to try out something new without the risk of being out $100+ if I couldn't get much done with it). A good recap of how free day went can be found at http://www.ubasics.com/sparkfun_freeday
I had a similar experience trying to get a Linux thumbdrive working on my Toshiba recently. Who the hell, in the '00's, thinks it's more appropriate to have a Floppy Disk Drive option on a BIOS than a USB thumbdrive option? Any sane person would assume (as I did) that that would be a good option for trying a new operating system, but apparently Toshiba thought otherwise (but thought the BIOS should account for FDD's, even though there ISN'T a floppy drive on the computer). I'm still putting off buying a new PC, but no one's making that easy for me.
In more exciting news, an 8880 Super Car (more descriptive links and photos can wait for another post) arrived at the house yesterday. I feel a great need to drop everything and build it (I was up until about 2 AM last night getting it started...)
On a more depressing LEGO-related note: the manager of the local LEGO store has apparently decided to start enforcing somewhat arbitrary rules of "family friendly" content on WITC displays. He's begun turning away spectacular models (and no, the one he turned down after it arrived for January was not unkosher in any way) and asking for photographs for pre-approval before anyone brings anything in. Way to turn what used to be a fun privilege into more of an obnoxious chore. Yes, it's the store manager's decision to make, but he clearly made the wrong decision here and I've never seen the company commit such an atrocious affront to the community before (and yes, I remember the grey/bley debacle). I had signed up to do a July display with fireworks in the background, but I'm not entirely sure that I'll follow through anymore - I have enough things I'm more excited about building for myself, and the last thing I want to do is work out a fantastic mosaic using tiny translucent parts only to be turned away for "endorsing explosives", or whatever other whim the manager has that day.
By the way, we were already getting the shaft on the WITC front. Most groups are allowed to use non-LEGO shelves to add height (say, a clear shelf to hold up a spaceship or display planes above a town) - but that's long been declared contraband at this location. I've also been told that minor discounts and payment have even been offered in some places to people contributing window displays. We, on the other hand, put in ridiculous amounts of effort to achieve heights on our models without using any non-LEGO parts, and are then "thanked" for it by these sorts of comments. Is it any wonder that there's trouble getting the fan community here excited about participating in events at the store? Heck, we can't even get our own group displays together 95% of the time. I'm becoming disillusioned with the whole process of group displays (just in time to plan LEGOPalooza next month!).
Enough of that, and the rest of the AFOL-community politics. I'm building myself an 8880, because I'm awesome (although not awesome enough to actually drive a car that nice...).
EDIT: The higher ups and LEGO Brand Retail have since done away with the Window Into The Community displays entirely. Which, given the mixed experiences with it and issues that have arisen in some stores, isn't entirely surprising.
I had a similar experience trying to get a Linux thumbdrive working on my Toshiba recently. Who the hell, in the '00's, thinks it's more appropriate to have a Floppy Disk Drive option on a BIOS than a USB thumbdrive option? Any sane person would assume (as I did) that that would be a good option for trying a new operating system, but apparently Toshiba thought otherwise (but thought the BIOS should account for FDD's, even though there ISN'T a floppy drive on the computer). I'm still putting off buying a new PC, but no one's making that easy for me.
In more exciting news, an 8880 Super Car (more descriptive links and photos can wait for another post) arrived at the house yesterday. I feel a great need to drop everything and build it (I was up until about 2 AM last night getting it started...)
On a more depressing LEGO-related note: the manager of the local LEGO store has apparently decided to start enforcing somewhat arbitrary rules of "family friendly" content on WITC displays. He's begun turning away spectacular models (and no, the one he turned down after it arrived for January was not unkosher in any way) and asking for photographs for pre-approval before anyone brings anything in. Way to turn what used to be a fun privilege into more of an obnoxious chore. Yes, it's the store manager's decision to make, but he clearly made the wrong decision here and I've never seen the company commit such an atrocious affront to the community before (and yes, I remember the grey/bley debacle). I had signed up to do a July display with fireworks in the background, but I'm not entirely sure that I'll follow through anymore - I have enough things I'm more excited about building for myself, and the last thing I want to do is work out a fantastic mosaic using tiny translucent parts only to be turned away for "endorsing explosives", or whatever other whim the manager has that day.
By the way, we were already getting the shaft on the WITC front. Most groups are allowed to use non-LEGO shelves to add height (say, a clear shelf to hold up a spaceship or display planes above a town) - but that's long been declared contraband at this location. I've also been told that minor discounts and payment have even been offered in some places to people contributing window displays. We, on the other hand, put in ridiculous amounts of effort to achieve heights on our models without using any non-LEGO parts, and are then "thanked" for it by these sorts of comments. Is it any wonder that there's trouble getting the fan community here excited about participating in events at the store? Heck, we can't even get our own group displays together 95% of the time. I'm becoming disillusioned with the whole process of group displays (just in time to plan LEGOPalooza next month!).
Enough of that, and the rest of the AFOL-community politics. I'm building myself an 8880, because I'm awesome (although not awesome enough to actually drive a car that nice...).
EDIT: The higher ups and LEGO Brand Retail have since done away with the Window Into The Community displays entirely. Which, given the mixed experiences with it and issues that have arisen in some stores, isn't entirely surprising.
Wednesday, January 6, 2010
Resolution Updates
Most of this falls under the category of "housekeeping", but here's what's new:
- Blog layout: a "Stalk Me!" section has been added, featuring a few links on places you can, well, stalk me. Current locations include Last.fm (interactive radio and music chart social network), Twitter (overblown RSS-enabled status engine/social network), and flickr (image hosting site that's also - you guessed it - a social network). In case you haven't noticed the trend, I'm a sucker for open platforms that are RSS enabled and I'm not terribly perturbed by the social network fad.
- Email catch-up: my main account is down to 50 e-mails, my spamblock account (which is practically a second regular account for me now) is fluctuating around 100 e-mails. My NCSU account was shut down suddenly during the Christmas break, and I never did finish back-up efforts started for it last summer. I wonder if they can still send me alumni e-mails.
Another issue here is the high growth of social network spam. I'm now automatically dumping all variety of friend/contact/etc requests on networks I use in favor of evaluating them next time I'm logged in (the doubling - between in-service "inboxes" and my e-mail inboxes - did nothing more than create more work and problems with synching things up). Facebook remains unresolved, and Facebook requests that I don't intend to follow up on are now a full 20% of my main e-mail account's unresolved mail. I may have to bite the bullet and log in a second time yet, but I still have no intention of using that obnoxious closed service. - Interesting sidenote: Retr0bright. Retr0bright apparently can un-yellow ABS. If you've tried it, let me know your results. I'll just deal with the yellowing in the meantime.
- Floppy Disks: My parents got wind of this resolution and took it up as well. They're now leaving me with their old disks (Dad can't be bothered to reuse/recycle them properly himself). I've begun research in the field of what to do with them next. Here are my findings thus far:
- GreenDisk IT recycling can apparently recycle all sorts of things, for a fee. I'm not ruling it out, but I always feel silly paying money to give somebody something that's technically still useful (the lack of need for that size, decrease of drives available, and difficulty searching disks are my motivations for getting out of there). Interesting source for this suggestion: a webpage entitled Recycling More Obscure Materials.
- ACT looks like it may be a charitable place to donate disks. Sadly, my experience with similar places requires me to do research to make sure this is fully legit and non-abusive, but I'm optimistic enough to list it here anyway. If you pursue it, let me know what you find out / how it goes.
- Associated Content has an article on Uses for Old Floppy Disks. It has some interesting ideas, but none particularly inspire me.
- Interested readers of this blog can let me know if they'd like some clean floppy disks. I have no idea what quantities are available, but I'm willing to hand some over in person or (if the quantity is great enough to justify the expense) mail some out.
- "Key"s? I've become surprised recently by the popularity of "USB Keys", which are idiotically small contents for a USB thumbdrive. Sometimes they're nothing more than a graphic, and autorun tool, and a link to a website. Why do I mention this here? I could start using old floppies as business cards, using that same "key" concept. You can get a decent amount of pictures and web pages in 1.44 MB after all - why not give out a small portfolio of low-res .gif images and web pages, with links to get to things like this blog? Traditional contact information also fits easily on the label section of a 3.5" floppy disk, and the extra size makes them less likely to get lost. Yes, I know it's not a printed LEGO minifig with my phone number on it (some people really do use those), but it's something both clever and affordable. It'd be a fun in-joke for the other people maintaining floppy disk drives as well (or really anyone with a working older computer), and an interesting piece of kitsch for people who don't (hey look! A floppy disk business card! Can you believe it?). Of course, if they get thrown away by the people who receive them, then this whole exercise in not wasting anything has been moot.
Saturday, December 26, 2009
Automatic Transmission Ideas
Recently, I built a variation on this design. It works pretty well, but is never truly at a 1:1 or 5:1 ratio. It's still not a true CVT, but so far it's the best LEGO attempt I've seen. The designs that pop up in a YouTube search are increasingly impressive, but it looks like we still don't have a reasonable solution to this problem.
On the bright side, I've now finally bought enough traditional transmission parts to build a really nice manual transmission. With any luck I'll post some sort of hybrid approach (which isn't that dissimilar from the 1/2/D/N/R set-up most cars I've been in actually have) one of these days.
On the bright side, I've now finally bought enough traditional transmission parts to build a really nice manual transmission. With any luck I'll post some sort of hybrid approach (which isn't that dissimilar from the 1/2/D/N/R set-up most cars I've been in actually have) one of these days.
Monday, November 9, 2009
November 2009 Raleigh, NC Window Into the Community Display
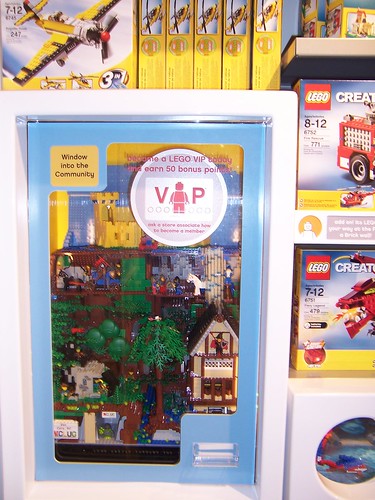
I recently built and installed a display for the Raleigh, NC LEGO store. My display, titled "LEGO Castle Through the Years", will be visible in the Window Into the Community (a special store window at LEGO stores that features creations by local builders - in this case it's in the back of the store, to your left as you look at the Pick-A-Brick wall) through the end of the month. For those of you who haven't been into LEGO Castle sets from the 1970's to today, the layout uses a variety of popular sets and minifigs from over the years - the landscaping and overall layout is an original design (as is the mill building styled similarly to the 10193 Medieval Market Village set), but most of the layout closely follows popular LEGO sets from over the years. Notable sets here include 375 Yellow Castle, 6066 Camouflaged Outpost, and 6038 Wolfpack Renegades. A few classic minifigs from various LEGO Castle lines show up as well - see if you can spot Majisto. The tree from 10193 Medieval Market Village
Matthew (Brickapolis) was at the swap-out and got some set-up photos. These are mostly for seeing me set up my display, but you can also get a glimpse of my tree technique. You can see the rest of Matthew's photos at http://www.flickr.com/photos/brickapolis/tags/nov/
My photos can be seen at http://www.flickr.com/photos/dp3/tags/november/ . I may add more photos later - I've been surprised to see how some details have come out in the end. A cave that I was afraid would be hidden turned out to actually be perfectly visible from a child's eye level, but appears to be covered by the large tree in the front when looking at it from an adult eye level. That's the only highlight that the brightly-lit display area has brought to my attention so far, but there may be others. I'd also like to try getting some photos with less glare - we'll have to see if I can get my camera back in there soon.
Thursday, October 29, 2009
"Instantly Recognizable"
If you've ever discussed LEGO blogging with me for any serious amount of time, you've probably heard me mention how difficult it is to find interesting things to say about other people's models. There are only so many complimentary words in the English language, and inevitably we end up repeating common phrases, descriptions, techniques, etc.
Over at The Living Brick, they've taken on one cliche I use regularly - "instantly recognizable". I would have linked to this over at LMOTD, but since that's supposed to be all kid-friendly and the link above used the word "testicle", it's off-limits there - so it shows up here instead.
Don't worry too much about this blog becoming an addendum to LMOTD - I'm working on some slightly longer-term projects lately, but I will post about some of them soon (most notably: Castle Window In the Community display and some updates on the still-unnamed robotic LEGO band).
Over at The Living Brick, they've taken on one cliche I use regularly - "instantly recognizable". I would have linked to this over at LMOTD, but since that's supposed to be all kid-friendly and the link above used the word "testicle", it's off-limits there - so it shows up here instead.
Don't worry too much about this blog becoming an addendum to LMOTD - I'm working on some slightly longer-term projects lately, but I will post about some of them soon (most notably: Castle Window In the Community display and some updates on the still-unnamed robotic LEGO band).
Wednesday, August 26, 2009
Tuesday, August 18, 2009
Lamp
At long last, I'm finally writing about the lamp. My lamp has been around for nearly a decade now, but since the largest event it's ever appeared at is LEGOPalooza at UNC Chapel Hill, not many people know about it. Everyone who has seen it expresses interest, though, and I keep saying one of these days, I'll write about it. That day is today. Sure, I wish I had better photos (these were taken before I bought myself a proper duster), but at least we're here now...
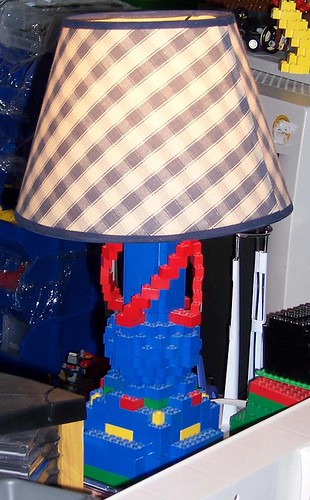
This is asculpture with a socket cord in it lamp made out of LEGO. Back when electronics casing hadn't become such a popular thing to build out of LEGO, I came across a socket cord at a hardware store and thought this would be a good opportunity to try my hand at building non-LEGO electrical matter into some sort of LEGO sculpture. Surprisingly, I'm yet to hear about anyone else building one of these, even though it is relatively simple to do.
I have built and re-built this a few times now, and I hope to post reasonably good instructions at some point in the future (sadly, the twisty red part isn't easy to toss into a CAD program to make instructions). You can get the gist of how this is constructed from the photos below. Sadly, none of these were taken with the intended clip-on shade, but I don't think it looks that bad with this lampshade either.
Personally, I don't think this should count as "cheating" - the cord, bulb, and shade are the only non-LEGO parts. This is otherwise completely purist - something that you can't do if you just build around a commercially available build-your-own-lamp kit. Socket cords are available at most hardware stores should you want to try this yourself.
On to the "detail" shots!
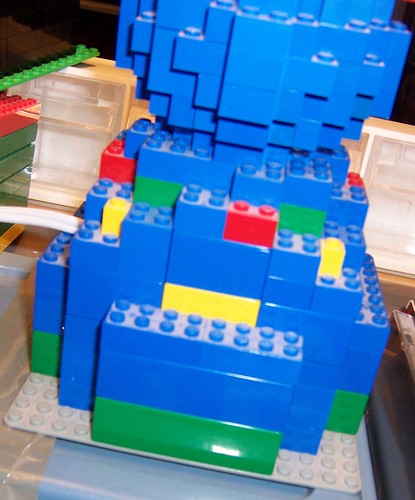
Here is the base of the lamp. Note how DUPLO bricks were used to create a sturdy base without using that many parts. A gap the size of one 1x1 LEGO brick was appropriate to get the cord out safely.
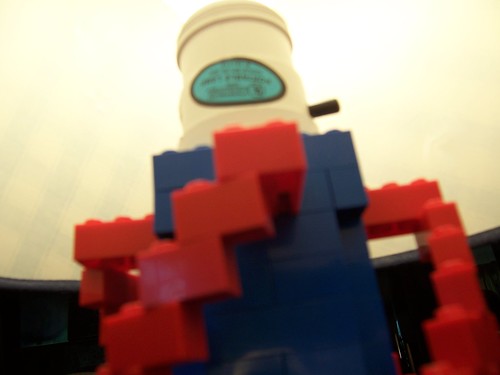
This is the top of the lamp. The cord was snaked through the entire construction, but the socket itself requires some extra support - which this little ledge you can see provides.

Here's the top section. When I built this, I was into showing off techniques. I don't think the design suffered for it. This is another fairly straightforward trick - just angle the bricks a little bit. You do have to make sure you get the right height in there - believe it or not, you can often get parts to "stick" in there when the connection is not really sturdy enough to stay. I put 8 bricks in between the two red 2x4s, but if I wanted to squeeze 9 or 10 in there and let things twist, I could have gotten away with it.
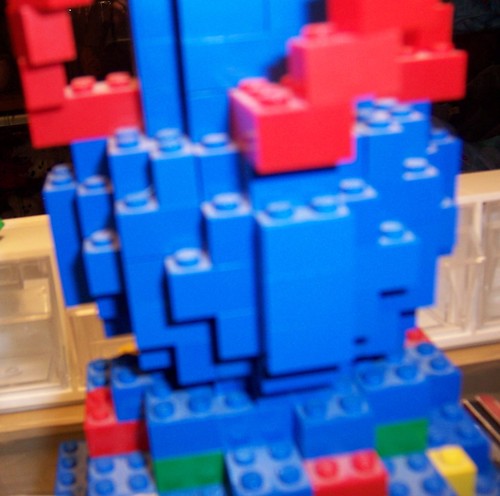
Look! It's my ball! Complete building instructions are available to download. This, by the way, is one of the reasons I decided to make my ball in sections that allow the "core" to be popped out.
That about sums it up. Any questions?
This is a
I have built and re-built this a few times now, and I hope to post reasonably good instructions at some point in the future (sadly, the twisty red part isn't easy to toss into a CAD program to make instructions). You can get the gist of how this is constructed from the photos below. Sadly, none of these were taken with the intended clip-on shade, but I don't think it looks that bad with this lampshade either.
Personally, I don't think this should count as "cheating" - the cord, bulb, and shade are the only non-LEGO parts. This is otherwise completely purist - something that you can't do if you just build around a commercially available build-your-own-lamp kit. Socket cords are available at most hardware stores should you want to try this yourself.
On to the "detail" shots!
Here is the base of the lamp. Note how DUPLO bricks were used to create a sturdy base without using that many parts. A gap the size of one 1x1 LEGO brick was appropriate to get the cord out safely.
This is the top of the lamp. The cord was snaked through the entire construction, but the socket itself requires some extra support - which this little ledge you can see provides.
Here's the top section. When I built this, I was into showing off techniques. I don't think the design suffered for it. This is another fairly straightforward trick - just angle the bricks a little bit. You do have to make sure you get the right height in there - believe it or not, you can often get parts to "stick" in there when the connection is not really sturdy enough to stay. I put 8 bricks in between the two red 2x4s, but if I wanted to squeeze 9 or 10 in there and let things twist, I could have gotten away with it.
Look! It's my ball! Complete building instructions are available to download. This, by the way, is one of the reasons I decided to make my ball in sections that allow the "core" to be popped out.
That about sums it up. Any questions?
Subscribe to:
Posts (Atom)